We know that managing metadata can be a headache. But, good metadata is a key to having potential buyers easily find and license your clips. So, we built some easy-to-use metadata tools into our asset manager. Whether you want to tag and manage clips on the fly, or easily import data from your own database, we’ve got you covered.
Below are three easy ways to take advantage of our tools as you manage your metadata.
1. Tag and manage a series of clips with our batch editor.
Whenever you upload a single clip, you are prompted to tag it with metadata. But, say you’re uploading a series of similar clips. Instead of tagging each with the same set of metadata over and over again, use our batch editor to assign data and descriptions to the entire series.
To do this, locate Assets in the left-hand toolbar. Upload or search for the series of clips you want to tag with metadata. Select the clips by checking the box next to the clip thumbnail.

Next, select the Batch Edit tab. Here you’ll be able to assign a variety of data and descriptions to the entire series. In the top section, you can assign a license type, publish the clips to the marketplace, include model releases, etc…

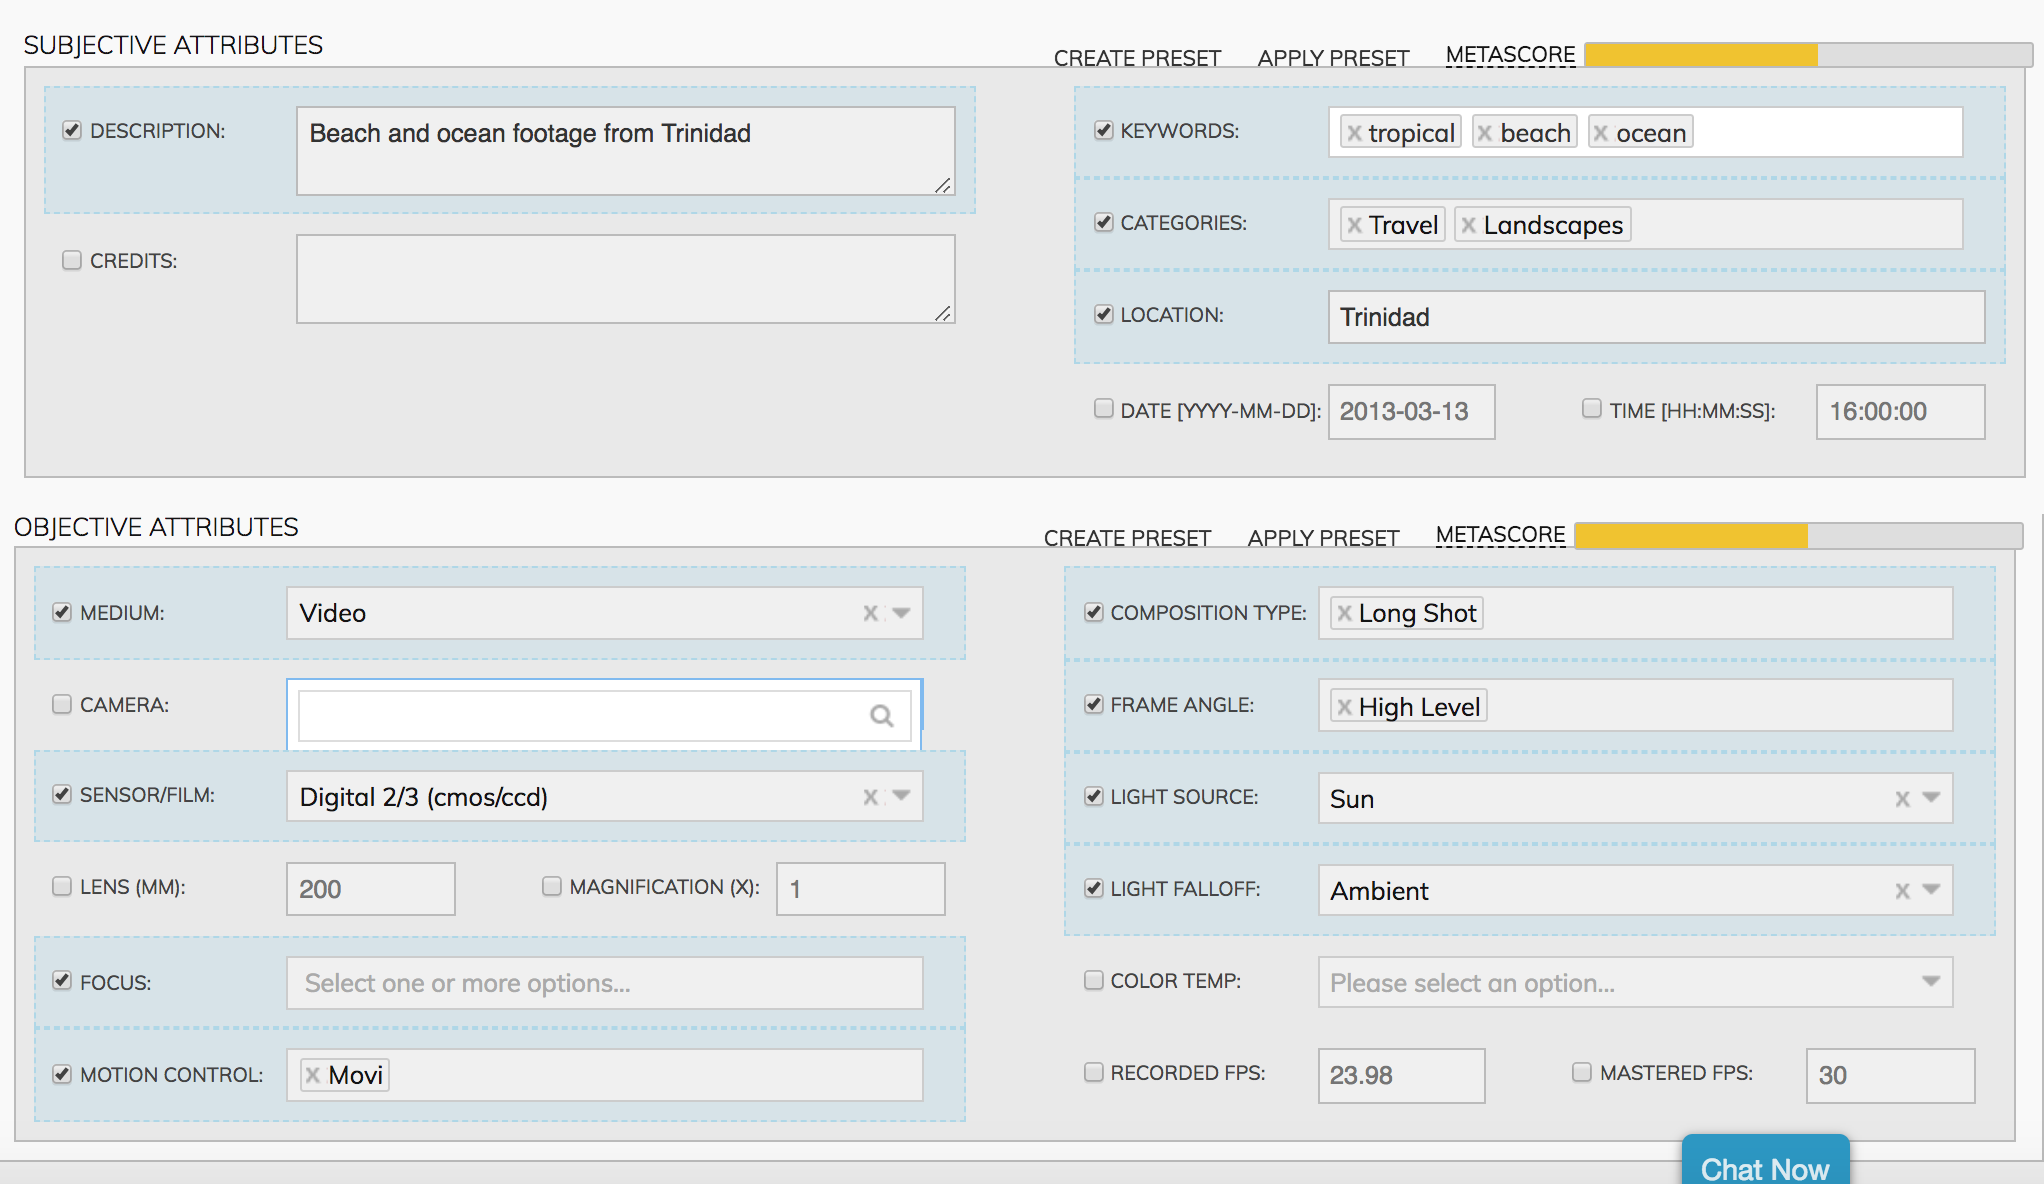
Further down, you’ll find finer detail metadata. Here you can define subjective attributes like descriptions, key words and locations. Enter objective attributes like camera, lighting, and color temp data. Our handy metascore bar lets you know how you’re doing based on the number and specificity of your entries. We require you add Title, Descriptions, and 3 Keywords, at minimum. But, the more you add here, the better!
2. Upload metadata from your own database.
If you already have a well managed database of metadata, you can use our .XLS and .CSV compatible template to quickly and easily upload metadata to your entire library.
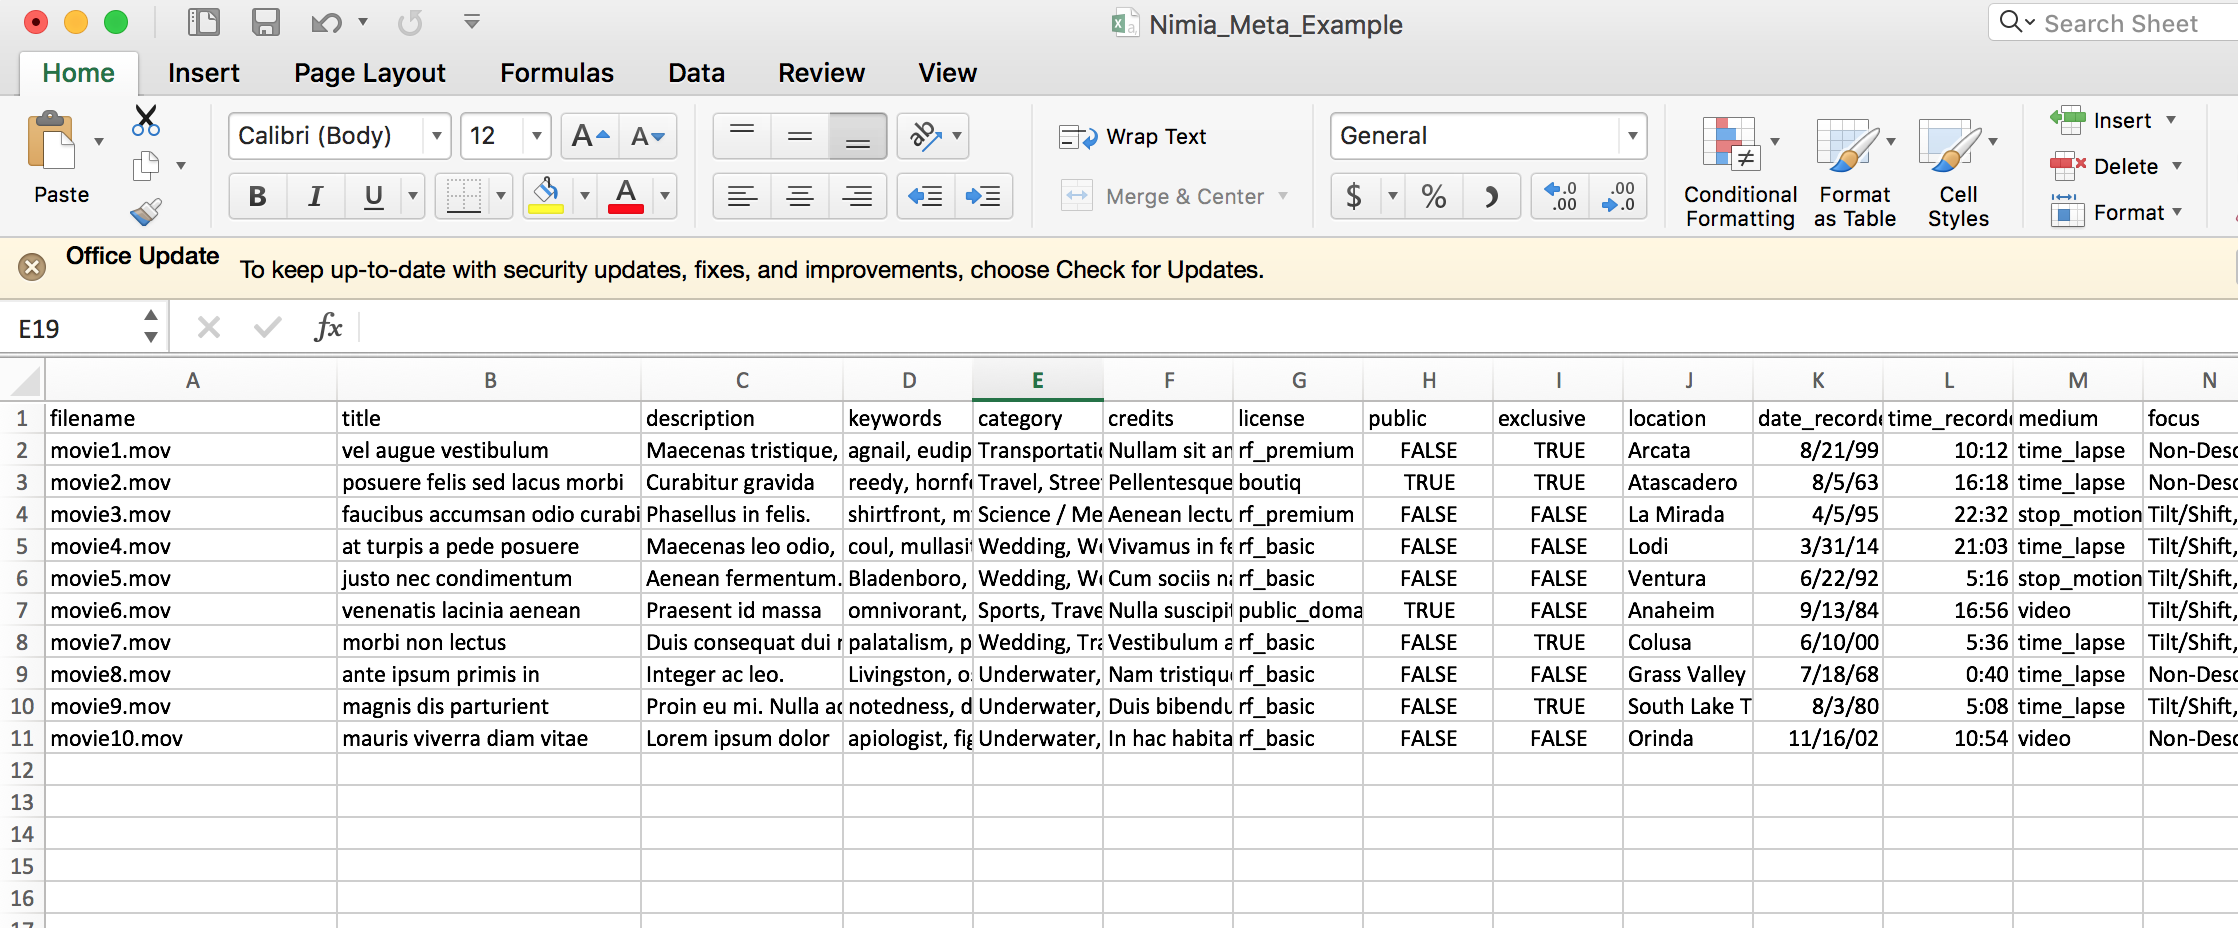
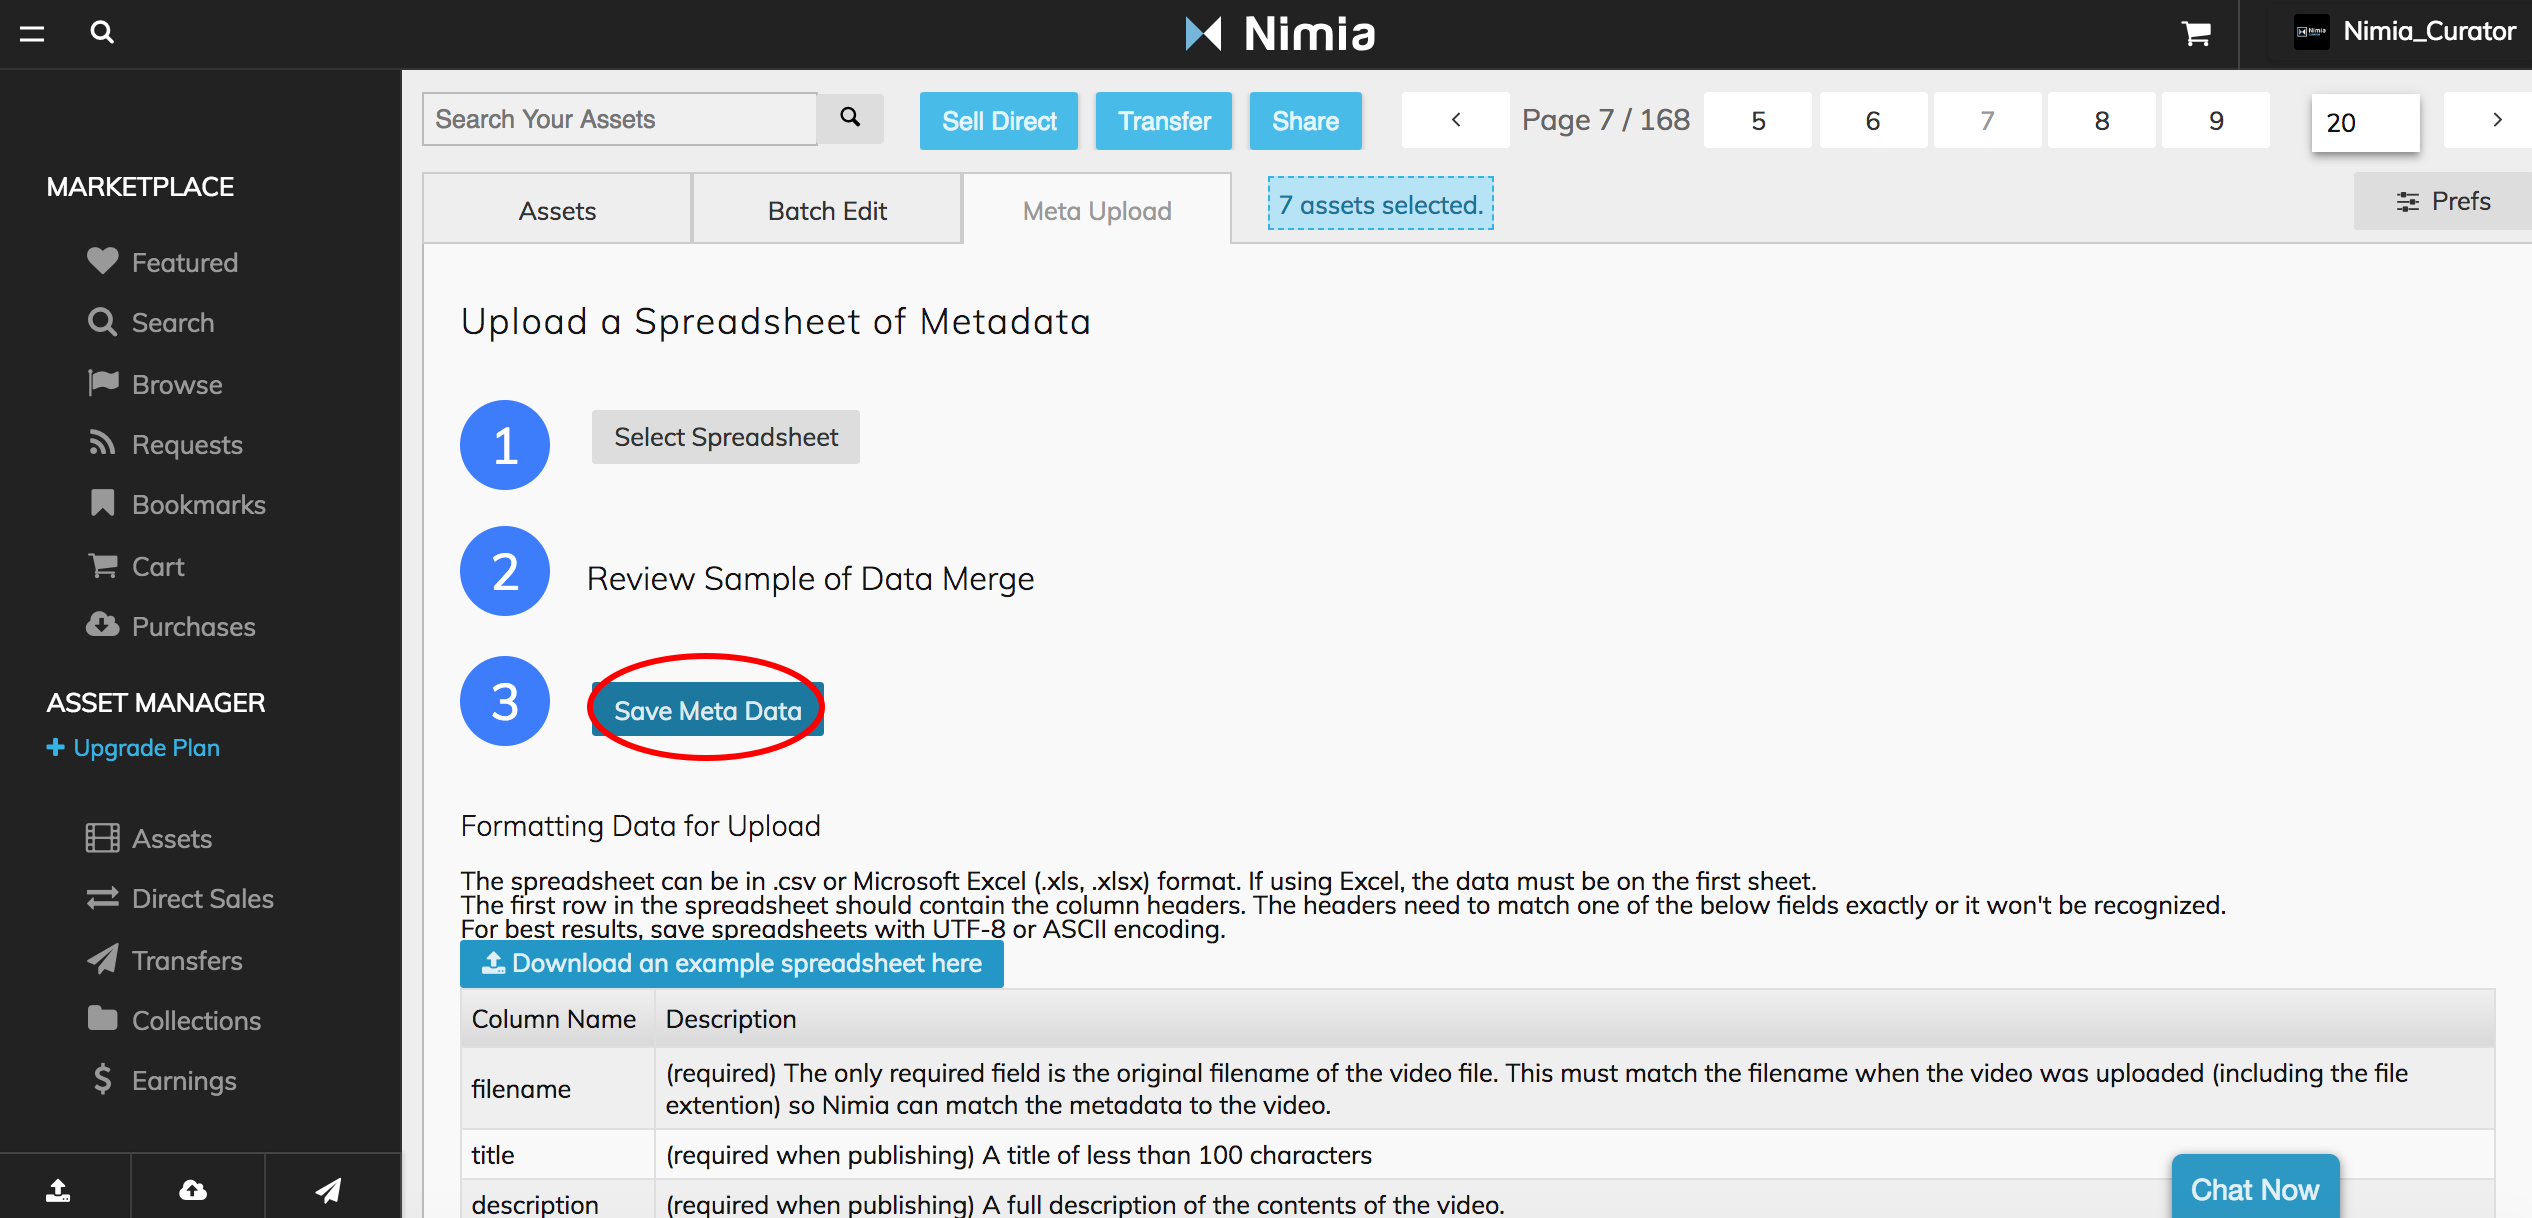
First, select the Meta Upload tab and download our free and simple spreadsheet template.

Then, review the template descriptions and requirements and then match your archived data with the template spreadsheet layout, ensuring metadata for each clip goes into the correct column. Important: Make sure the file name you use in this spreadsheet exactly matches the name of the clip uploaded to Nimia.
Finally, back on the Nimia platform, select “Select Spreadsheet” and select the filled out template. Review the sample of merged data and make sure the data migrated over correctly. If everything looks good, select Save Metadata. Now, all your clips will be tagged and ready to be found!
3. Export metadata stored in the Nimia asset manager for your own use.
In addition to a variety of ways to tag and manage your metadata on the Nimia platform, you can also export all of this data into a .CSV file. This provides an easy way to manage complex libraries and data sets, allowing you to edit and manipulate data in spreadsheet form and then re-upload to Nimia (see tip #2 above). Or, you can simply export the data to offline or in other applications.
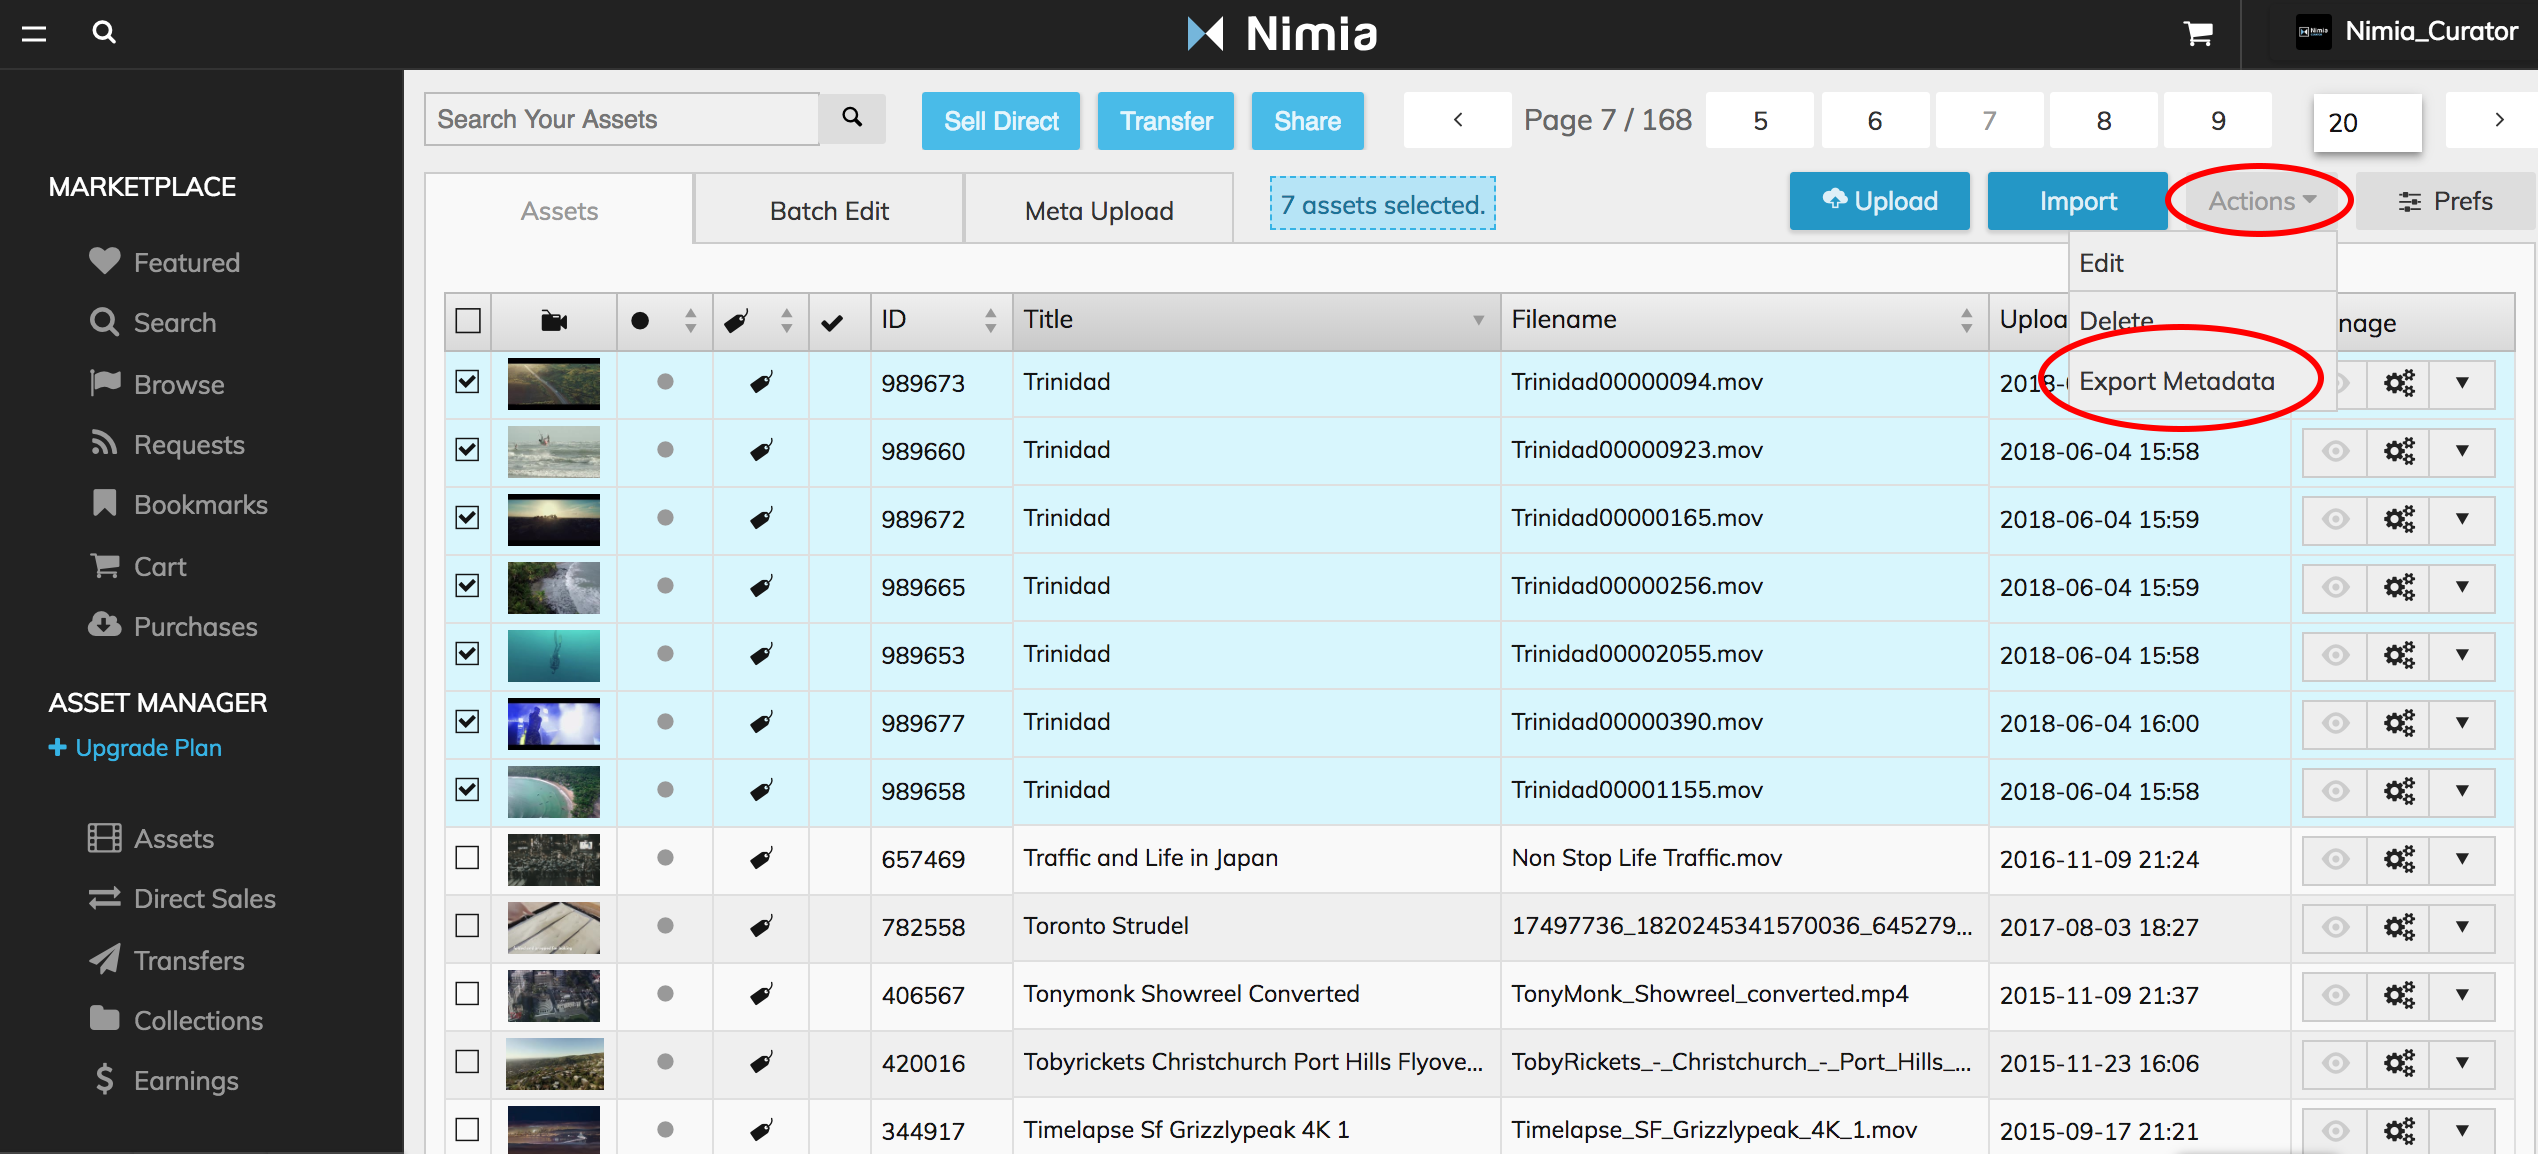
Exporting the data is easy. In the upper right corner of the asset manager, click the “Actions” dropdown and then select “Export Metadata.” The exported metadata file with be emailed to the email address associated with your account.
—–
Learn more about Nimia’s tools and services for filmmakers here.