In this third and final post in our series on HDR, we’ll discuss some basic considerations for shooting, grading and delivering HDR footage. In the first post in our series, we explained what HDR is and why it’s important. Our second post covered HDR monitors. This final post will explain how to shoot and grade HDR video footage, giving you a sense of how you can create HDR footage from start to finish.
Shooting for HDR
Shooting for HDR isn’t technically any different from shooting for SDR. If you’re using a modern, professional grade camera, you are able to shoot footage that is HDR-ready. It’s recommended that you record in raw or log (with raw being the better of the two) so you can apply heavier grading in post production. Otherwise, it is safe to assume that any shot that looks good in SDR will look even better in HDR, if graded properly.
However, there some basic principles of cinematography that are extra-important to keep in mind when shooting for HDR that will help make the most of the expanded range of image information recorded by your camera.
For example, make sure to avoid clipping whites and crushing blacks in your shots. What does this mean, exactly? Clipped whites can happen when your shot contains a region of bright light compared to the overall image. If you allow the camera to capture too much light in a small patch of sunlight peeking through clouds or a bright light in a dark scene, you may end up with an area so overexposed it has lost all information and detail in that section of the image. The resulting bright, blank spot will stand out that much more in HDR.
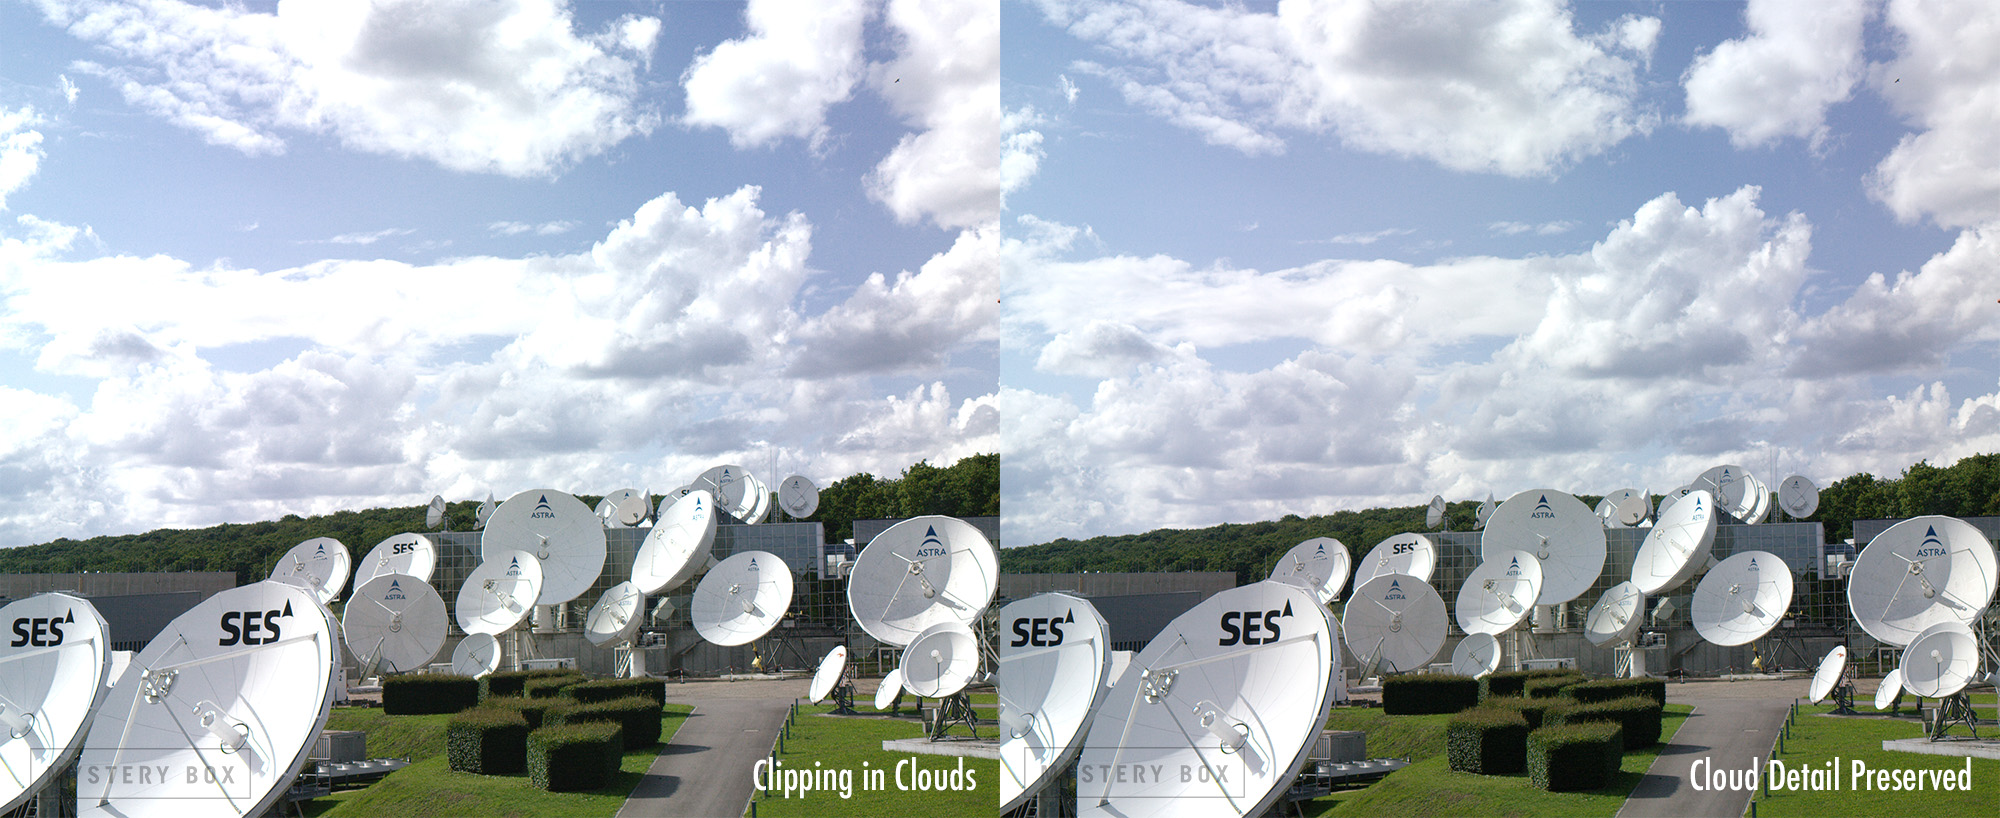
Photo source: Mystery Box
Similarly, crushed blacks happen when you lose details in dark regions of a shot. If the darks become too dark, it may be impossible to get the details and textures within those regions back when you grade.
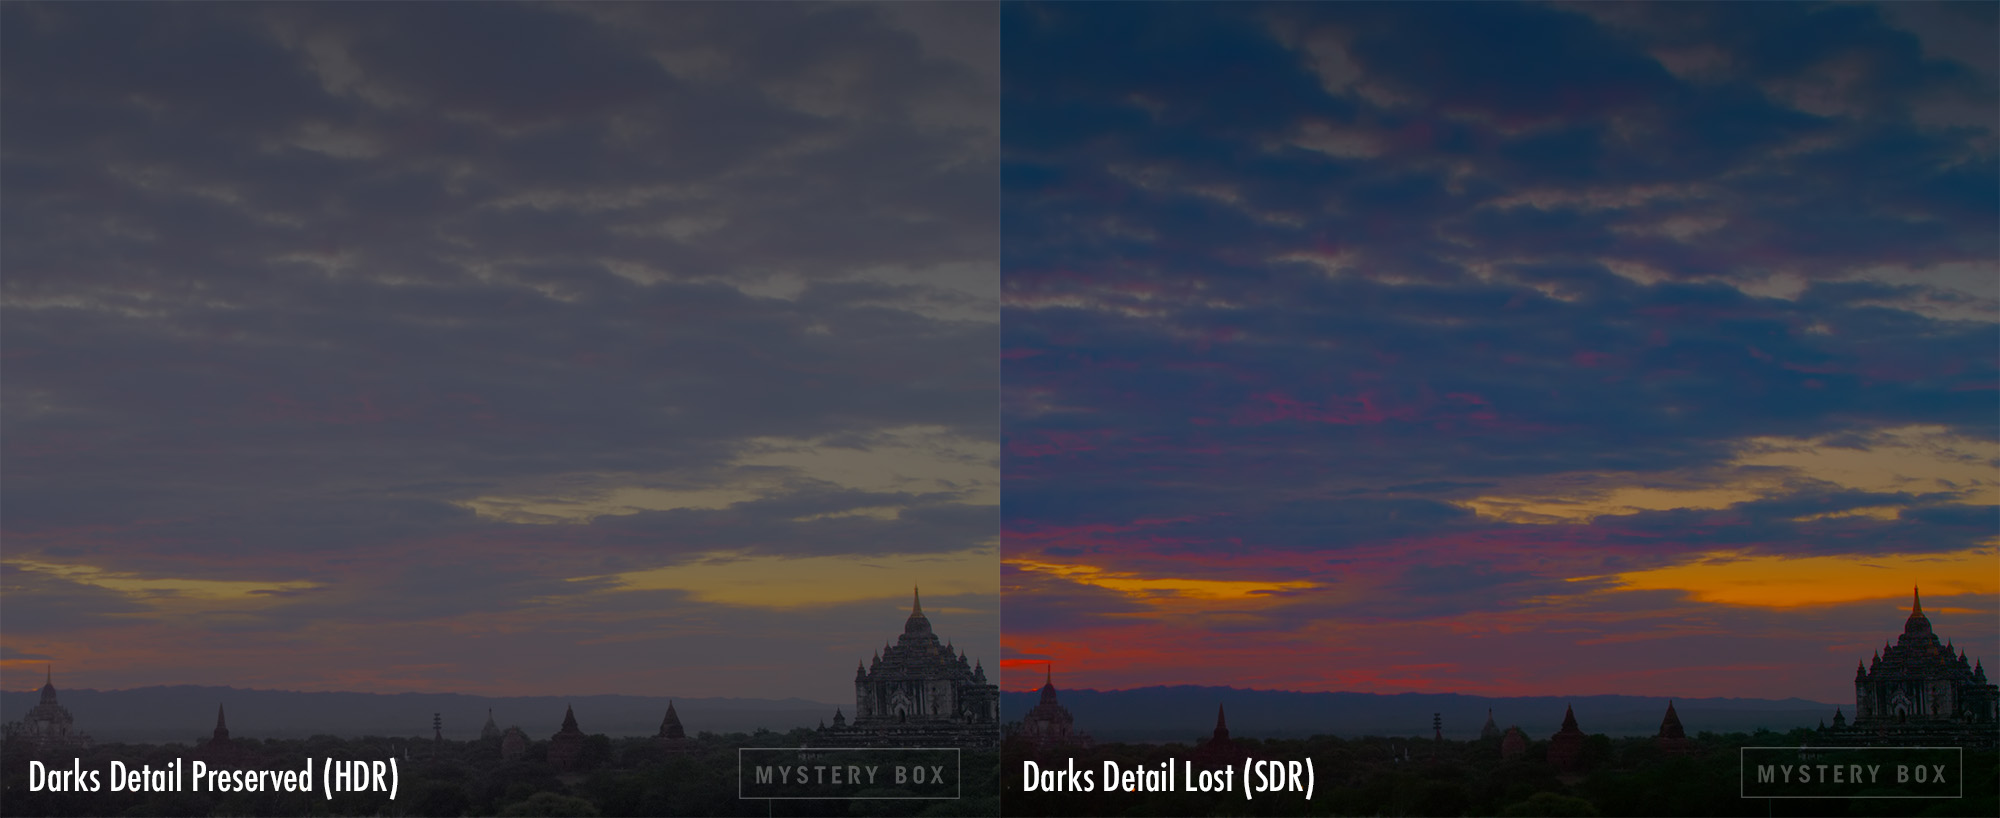
Photo source: Mystery Box
So, while some of this advice sounds like video 101, it becomes even more exaggerated with HDR cinematography. HDR imagery viewed on an SDR display can sometimes appear washed out or flat. But, when displayed in HDR, the expanded range of light and color show off the preserved details in highlights and shadows, bringing the overall image to life.
Software Applications
Before you grade, you’ll also need software capable of HDR editing and output. Not all built-in color grading tools and plugins for popular editing software support HDR. Davinci Resolve remains the most popular program for grading for HDR because it offers the flexibility to be compatible with Dolby Vision and HDR10 (using ST.2084) and Hybrid Log-Gamma (HLG). Adobe Premiere Pro, Avid Media Composer, Final Cut, and SGO Mistika are also options.
If you’re intending to grade for Dolby Vision, it isn’t that simple. Dolby Vision not only requires the use of a certified Dolby Vision Mastering Monitor (see our last post for more about HDR monitors) but requires a license for its color-grading system, which outputs the metadata required to display the content in Dolby Vision. You can apply for a Dolby Vision license here (link).
The Grading Process
Once you’ve captured footage and have a proper HDR reference monitor, you’re ready to grade.
Before we cover any specifics about grading for HDR, it is important to understand that it’s impossible to grade for every screen and every viewing environment at once. For example, your footage may be displayed in only controlled dark environments on a top-of-the-line HDR screen. Or, more likely, your footage may end up displayed on a variety of consumer-grade display types and in a variety of viewing environments (think about daylight or office lighting.) The more you know about how your footage will be viewed, the more you can factor that into the grading process.
From here, the grading process varies depending on the application software you are using, your desired output, and your preferred workflow. The video below provides a great overview of what it’s like to grade for HDR 10 using Davinci Resolve:
The Bottom Line
HDR video technology and grading workflows can sound complicated, expensive and daunting to take on as a small filmmaker. As this technology becomes more prevalent in the media landscape, there is much more demand for HDR content at the consumer level – meaning soon, if you’re not creating HDR-ready content, you’ll fall behind. We hope this complete series on HDR video can help filmmakers at all levels understand their options for shooting, grading and delivering quality HDR content. As the technology changes (and it definitely will!) we’ll do our best to keep our information relevant and as up-to-date as we can.